
Author: Randeep Singh / go to all Techniques of Yoga articles
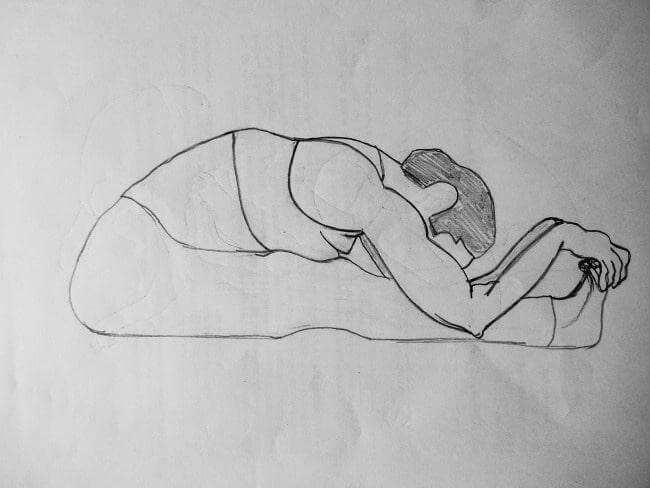
Paschimottanasana or Westside back
stretch as it is called,
is considered as the best form of
abdominal exercise,
by Swami Swatmarama in his
Hatha Yoga Pradipika.
Paschim meaning West
in English stands for the backward
side of the body in Yoga.
The front side of the body is known as east,
as it is traditional to face east while doing Yoga. Paschimottanasana provides a complete stretch to the entire backside, from the heels to the base of the skull.
Preparatory Poses – Paschimottanasana
- Uttanasana
- Balasana
- Janu Shirshasana
How to do Pashchimottanasana
Before attempting the final pose one must practice the dynamic variations of Paschimottanasana in order to loosen up the hip flexors, the hamstrings and the lower spine muscles which play a pivotal role in aiding the practitioner for getting into the final posture. Do this forward bend by strictly following the guiding principles, and with complete awareness of what a yoga asanas is.
Preparatory exercise
- Sit on the floor with legs stretched in front of you, toes touching and turned inwards, Knees extended ( Straight), quadriceps stretched towards the waist, back straight with the lordosis in the lower spine intact, the thighs drawn in and pressed to the floor
- Place the arms beside the forward tilting hips pointing ahead, relax the entire body ( Dandasana)
- Inhale and stretch both the hands overhead, stretching from the hips right up to the fingertips
- Exhale and start bending forward from the hips till the hands touch anywhere on the legs, ankles, shins or the toes
- If the exhalation is continued slowly keeping the abdomen drawn in one can easily reach the toes
- Look ahead in case you are stiff, try to pull yourself forward, not down by pulling on to your toes with your hands keeping the head up
- Inhale and raise the chest to the point where the arms are straight
- This will flex the hips to the maximum possible essential for reaching the final posture
- Keep the knees pressed on the floor throughout
- Suspend the breath and stay in this position for a few seconds
- Slowly release the toes while inhaling and raining the hands up the upper body move back till it reaches the starting position again
- Attempt this sequence for at least three times before attempting the final posture of Paschimottanasana
Nishpanda Bhava
Final posture
- Sit in Dandasana as explained above, Inhale and raise both your arms overhead, stretching up from the base of the hips through the torso into the arms and fingers of the hand
- Exhale, start bending forward from the hips till the arms reach wherever possible on the legs below, keeping the back straight throughout
- Relax the upper back, chest and the shoulders while exhaling further and grab the toes with your hands on both sides
- Walk with your hips for a few steps to release the stiffness of the lower back muscles
- Keep exhaling and lengthen the torso by pulling on the toes with your arms keeping the head and chest up, draw the groin into the pelvis
- Bend the elbows out and lift them up, pull the forehead straight in the direction of the toes
- Further exhale and flex your elbows, start bending down in an effort to first rest the lower abdomen, then the upper abdomen and last the ribs on the thighs, followed by the head in the gap between the knees, or on the shins depending on the length of your torso or how much you had managed to stretch forward
- Remain in this position for a few seconds while breathing normally
- Release the Paschimottanasana by beginning to inhale and releasing the hold of the hands on the toes
- Continue to inhale while you lift your torso and raise your arms overhead, parallel to each other
- Rotate the palms outward, lower the arms by giving a backward rotation to them at the shoulders and place them besides the hips
Breathing Pattern – Repetitions & Duration, Paschimottanasana
Follow the below-mentioned breathing time sequence for enhancing the therapeutic effectiveness of Paschimottanasana.
Dynamic Version:
- Start with inhaling for 3 seconds, bend forward by exhaling for 3 seconds, remain in the final pose during the suspension of breath for 6 seconds, release the pose by inhaling for 3 seconds
- Repeat this without pausing for 3 rounds per minute
Static version:
- Breathe normal, slow and naturally when staying in the pose for a longer duration than mentioned above, but never longer than 2 mins to a maximum of 5 mins at a single go
- Beginners to Paschimottanasana should perform a minimum of 2 and a maximum of 5 rounds wherein they stay in the final posture for shorter durations of time
Follow up Poses – Paschimottanasana
- Setuasana
- Ardhmatsyendra Asana
- Chakrasana
- Bhujangasana
- Matsyasana
Alignment essentials & Modifications of Paschimottanasana
- Avoid bouncing in or out of Pashchimottanasana, a common tendency by persons with stiff bodies
- Focus on relaxing the entire body, upper back, chest, neck, shoulders, and hands in particular, in order to be able to get deeper into the pose
- Do not hold the breath when in the final posture due to compression on the chest and abdomen, instead draw the abdomen further in and create the space between the thighs and the chest and breathe normally
- Remember to exhale and then move the torso down in a rhythmic manner
- Turn the toes in for relieving the tension in the back of the legs, this will help open up the hips and the hamstrings faster
- Be aware of the points of pain or resistance in the body, ignoring these will scuttle your attempts to go deeper into the pose
- Developing the feeling of “let go” actually helps with going deeper into Paschimottanasana
- Focus on flexing the hips and the spine, begin and end the posture with an upward stretch, shoulders back and down
- For persons with lower back problems make sure that the stretch is maximum at the back of the legs and minimum in the lower back
- Keep the legs together throughout, in case extra pressure is felt in the lumbar region, bend the knees for transferring the effect of the stretch to the hamstrings
- For deepening the Paschimottanasana further, grasp the soles of the feet with the palms, or take the back of one hand to entwine around the soles and hold the wrist of this hand with the other hand, or place a block touching the soles of the feet and grasp the sides of this block
When to avoid Pashchimottanasana
Persons with conditions like Slipped disc, Sciatica, Asthma, Diarrhoea or any other lower back problem must avoid doing Paschimottanasana
Advantages, Benefits of doing Paschimottanasana
- As this pose compresses the adrenal glands situated in the lower back, it helps with calming the anxiety, stress and any tensions when held for a longer duration, it forms the part of yoga for healthy adrenal glands
- Paschimottanasana also helps with reducing the feelings of anger and irritability
- It stretches and tones the hamstrings, hip joints, and massages the entire abdominal and pelvic region, reducing weight in these areas, a yoga regime for opening the hamstrings is not complete without this asana
- Due to its impact in the abdominal region, where a majority of the vital organs of the body are located, it helps improve urogenital disorder, menstrual disorders, bronchitis, eosinophilia, diabetes, colitis, liver and kidney problems. It is must-have for the yoga for urogenital disorders, and yoga for healing eosinophilia
- Paschimottanasana if done consistently helps improve conditions like constipation, dyspepsia, flatulence, indigestion, it is a favorite with practitioners of yoga for dyspepsia
- Pachimottanasana is very good for correcting the deformities of the spine as it stretches almost all the major muscle groups of the posterior side of the body as the flexion of the spine takes place equally throughout its length.
- The nervous system is also strengthened by the regular practice of this asana